Alright, let's talk about shed foundations. It's not the most exciting part of getting a new shed, I know, but honestly, it's probably the most important. Skimp here, and you're just asking for trouble down the road – think doors that won't close right, water damage, and a shed that just falls apart too soon. I've seen it happen way too often, especially around some of the older homes near Mount Helix where the ground can be a little... well, tricky.
Before You Dig: Planning Your Shed Foundation
First things first, you've got to figure out what kind of shed you're actually putting in. Is it a small storage unit for garden tools, or are we talking about a bigger workshop or an office shed? The size and weight of your shed will totally dictate what kind of foundation you need. A tiny, lightweight plastic shed might get by with just a simple gravel base, but anything substantial, especially if you're getting a custom-built structure from La Mesa Custom Sheds, needs something much more solid.
You also absolutely need to check your local La Mesa building codes. Seriously, don't skip this step. Depending on how big and tall your shed is, you might even need a permit. Even if you don't need a full-blown permit, there are almost always rules about how close you can build to property lines and other structures. A quick call to the city's planning department can save you a massive headache later, trust me.
Then there's the site itself. Go walk your yard. Is the ground level? Does water pool there when it rains? You definitely don't want your shed sitting in a puddle, right? Good drainage is absolutely crucial. If your spot isn't naturally well-drained, you'll need to plan for some grading or maybe even a French drain system. Here in La Mesa, we get our fair share of rain in the winter, and you really don't want that water undermining your foundation.
Foundation Options: What's Right for Your Shed?
You've got a few main choices for shed foundations, and each one has its good points and its not-so-good points:
- Gravel Base: This one's best for smaller, lighter sheds. You'll need to dig down a few inches, lay some landscape fabric to keep weeds out, and then fill it with compacted gravel. It drains well and gives you a pretty level surface. You can probably do this yourself if you're okay with some digging and leveling.
- Concrete Pavers or Deck Blocks: This is a step up from just a gravel base. You'll still need to get a level gravel bed ready, but then you'll place concrete blocks or pavers strategically to support your shed's runners. It works well for medium-sized sheds and is a common DIY project. Just make sure those blocks are perfectly level and really well-supported.
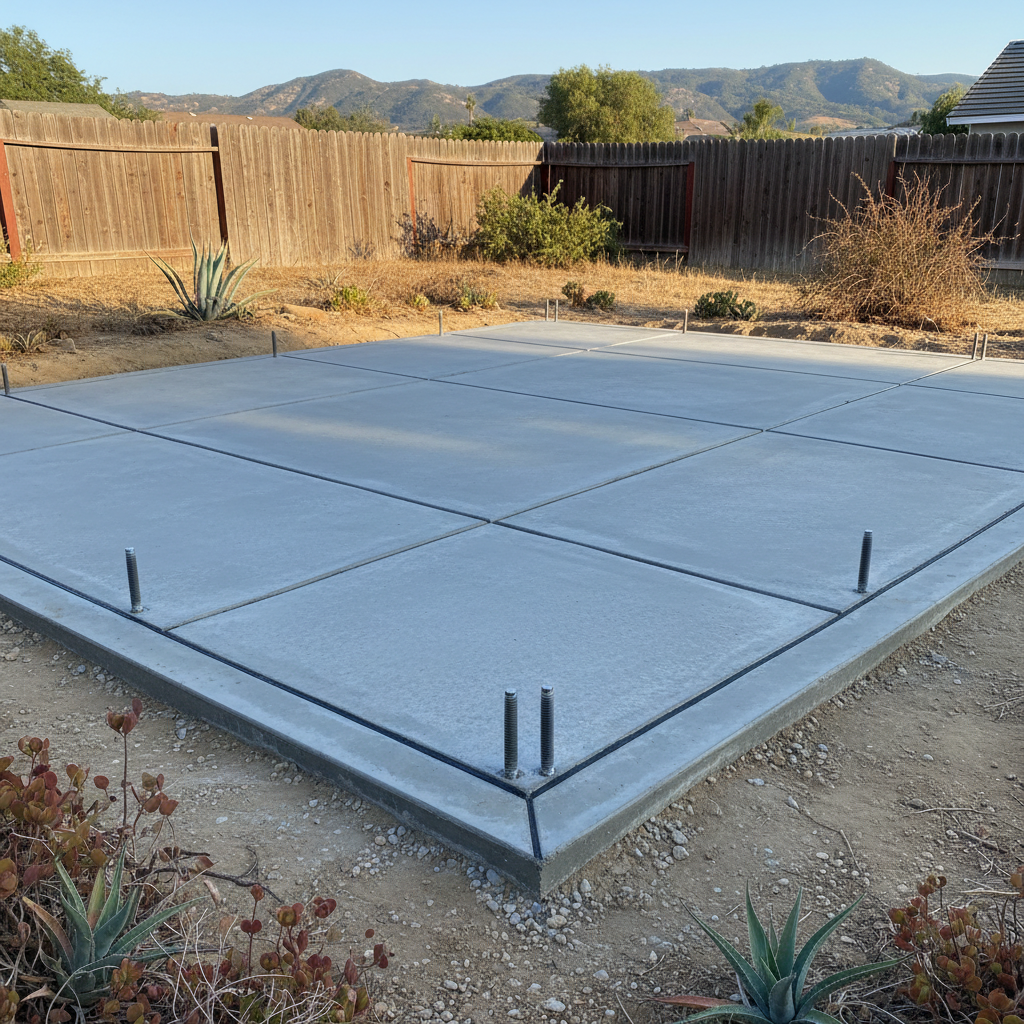
- Concrete Slab: This is the top-tier option for larger, heavier sheds, especially if you're planning to use it as a workshop or office. A concrete slab gives you a rock-solid, permanent, and pest-resistant base. It's also the most involved option and usually means you'll need professional help. We're talking excavation, rebar, building forms, and pouring concrete.
- Skid Foundation (Pressure-Treated Runners): Lots of pre-built or kit sheds come with pressure-treated runners. These sit directly on the ground or on a gravel base. They're good because you can move the shed later, but you still need a very level, well-drained site to keep rot and settling from happening.
DIY vs. Calling a Pro: When to Make the Call
So, when do you roll up your sleeves, and when do you just pick up the phone? For a small, lightweight shed on ground that's pretty flat and drains well, a gravel base or paver foundation is definitely something most handy homeowners can tackle. You'll need a shovel, a level, a tamper, and some good old-fashioned elbow grease. Just take your time, measure everything twice, and make sure it's absolutely dead level.
However, if you're looking at a larger shed (let's say, over 100 square feet), or if your site has steep slopes, drainage problems, or tricky soil conditions, I'd really recommend calling in a professional. Pouring a concrete slab, for instance, is a huge job. Getting the grade right, setting the forms, mixing and pouring the concrete, and making sure it cures properly – there's a lot that can go wrong if you don't have experience. A poorly poured slab can crack, settle unevenly, and cause big structural problems for your shed. It's just not worth trying to save a few bucks upfront only to have to redo it later, is it?
Even for a skid foundation, if your yard isn't perfectly flat, a pro can quickly and efficiently level the ground and make sure you have proper support points. That saves you hours of frustration and potential issues down the line. We've done countless shed foundations over the years, and we really know the ins and outs of La Mesa's varied terrain, from the flatter areas closer to Grossmont Center to the steeper hillsides.
After the Foundation: Keeping it Solid
Once your foundation is in, don't just forget about it. Periodically check around your shed. Look for any signs of settling, erosion around the base, or standing water. Make sure your gutters are directing rainwater away from the foundation. If you have a gravel base, you might need to top it up every few years. If you notice cracks in a concrete slab, especially big or spreading ones, it's a good idea to have someone look at them.
A solid foundation is truly the backbone of a long-lasting shed. Take the time to plan it right, pick the correct type, and don't be afraid to bring in the experts when the job really calls for it. You'll be glad you did when your shed stands strong for years to come.